Solar Power Update June 2026

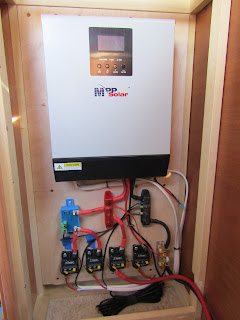
Last year I started noticing the LiFePo battery wasn't fully recharging. The maintenance charge level is set at 13.6V and it wouldn't quite reach that level. I tried to do some troubleshooting and decided at the time that the MPPT battery charge controller built into the MPP Solar all-in-one (AIO) system had gone bad. Rather than tear into the MPP AIO system and replace the MPPT subsystem I chose to bypass the internal MPPT charge controller and install a cheap Bouge 20A auxiliary PWM solar charge controller. This seemed to do trick...until this year when the problem reoccurred, only worse. So I did some more in-depth troubleshooting and determined that the Newpowa 210W solar panel loaded voltage was not reaching voltages high enough to recharge the battery. I measured 15.6Voc at the panel under strong lighting conditions which is no where near the 19.8Voc panel rating. And at the Bouge 20A controller was reading in the high 13's voltage under load . This resulted in the ba...