Quality Time
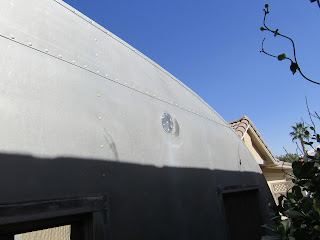
It was patching day for the Boles. There were two largely unprotected openings to the weather than needed to be addressed. One was factory original: the 3" circular oven vent was covered by a small louvered panel. The second was a large 18" x 16" opening cut into the side of the trailer by a previous owner just to the left of the door. This was also covered, somewhat more haphazardly, with a cooler vent.
Both of these vent contributed greatly to the water damage to the trailer interior. The cabinets were in ruins and the floor is toast. The window seals didn't help but I don't think they were the major water damage culprit.
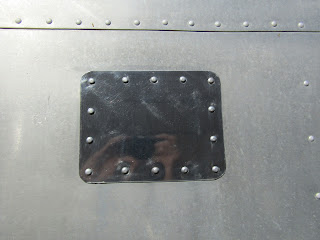
The oven vent cover. The water tank also had a vent line that ran to this opening.
After the vent cover was replaced
I picked up some 0.040" 2024T3 Alclad from Aircraft Spruce and Specialty company to use as patching material. They have a good selection of aircraft construction material, they cater to DIYers, and their "will-call" location in Southern California is open despite the current COVID-19 precautions. The sheet metal comes protected with plastic film on both sides.
During the past week I picked up some metal working tools to facilitate the effort: a Genesis GES40 Variable Speed Electric Power Metal Shear, deburring tool and metal countersink, and some #21 cobalt split point drill bits (very slightly larger than the 5/32" rivets I planned to use). The tools all worked pretty flawlessly to create the patches. I rounded the corners of the patches using some tin snips and a metal file.
The small patch went smoothly. The worst part was the Sika squeeze out: I applied Sikaflex 221 to the trailer and patch to act as a sealant/adhesive. As the patch is riveted tight the Sikaflex oozes out the edges and holes. This is a good thing because it'll keep it from leaking, but it can make for messy riveting. Plus that stuff doesn't clean up as easily as a silicon caulking product.
The large hole to the left of the door
Viewed from the inside - what were they thinking?
With the vent cover removed.
After removing the vent cover and wood framing inside the trailer, I needed to fabricate and drill the large patch. The patch was 28" x 18" so that I could cover the assortment of holes the prior owner had drilled. Taking a cue from the Boles factory I wanted to back the long rows of rivets with something that provided some rigidity so I used some extruded aluminum L channel. As a result I'd be riveting through 3 layers: 2 layers of sheet aluminum and the aluminum channel. Getting the drilled out holes aligned was a time consuming chore.
Eventually I called Becky back out to buck the large panel. It was a serious and unexpected PITA. I'd purchased 1/2" rivets and needed to trim them to the proper length using my rivet cutter, but the rivet cutter cuts off the chamfered tip of the rivet so some of them would catch as they were inserted. This resulted in cursing because with the Sikaflex oozing in the holes you couldn't really tell if the 3 layers of rivet holes were seriously misaligned or if the rivet was just catching an edge.
Eventually we worked our way though it by gaining some technique and being a bit more methodical about using the Cleco's to make sure the holes were fully aligned.
It took a half hour to clean up the thin layer of Sikaflex that had gotten on every exposed surface as we handled tools, rivets, and the panel itself.
In the end though the patches look good and Becky and I proved once again that we can get through just about anything together. I broke out the Sharpie and we signed our work. Maybe in 72 years when this trailer is renovated a 2nd time someone will discover our signatures.
Signed labor of love
Update (10/25/20): Becky and I riveted in a small patch to cover the original shore power connection. Why it was so high off the ground I don't know. I guess if the trailer park hook-ups were high then you could walk under it.
I used a "nibbler" drill attachment to cut the small disk. The nibbler requires a hole in the center for the radius rod so that you can nibble out a circle. It went real smoothly.


Comments
Post a Comment